
Background
If you have an Omega 4×5 variable condenser enlarger, you probably know it is common to use 75W and 150W bulbs in them. These enlarger bulbs are designated #211 and #212, respectively. Often they are referred to as the PH211 and PH212. You may also know there is a brighter alternative that will physically fit. The #213 is a 250W version of the above and is available online from Freestyle, B&H, and 3rd party sellers on Amazon. I measured the new bulb at about 1.3 stops brighter than my 150W bulb which already has quite a few miles on it.

Left to right: 250W #213, 150W #212, and 75W #211
In its stock configuration, the Omega variable condenser lamp house is not rated for the 250W bulb. My particular enlarger is rated at 75W and specifies the #211 bulb.

Lamp enclosure for Omega D variable condenser lamphouse.
Newer versions of the lamphouse are apparently rated at 150W, although I don’t know of any design differences. I have been using the 150W bulb in my enlarger for years with no problems. The power cord can certainly handle the load and there are no signs of any heat damage. But, even with the 150W bulb, my condenser enlarger is not as bright as my Chromega with its 250W reflector bulb. This is a problem when I intentionally enlarge big and crop small to accentuate grain. I’m not a fan of long exposure times measured in minutes.
Omega made a blower for the condenser lamphouse to specifically allow the use of the 250W bulb. The Omega part number is 412-020. I’ve never seen one, but it is listed on the KBH Photografix website.
There have been discussions on web forums on this topic. Some suggest using an LED head to get more brightness. In one discussion on the Large Format Photography forum, the highly regarded Bob Carnie of Toronto, posted that he has been using 250W bulbs in his Omega condenser heads for years with the only downside being a shorter lifespan for the bulb.
Anyway, on a recent project, I really wanted to shorten my exposure times, so I ordered one of the 250W #213 bulbs and started experimenting to assess the effects of using such a hot bulb.
Experimentation
I decided to test each of the three bulbs, 75W, 150W, and 250W, under identical conditions and collect some temperature data. I do not have an IR temperature gun and I was mainly interested in reading internal temps, so I used the thermocouple that came with my multimeter. I suspect the readings lag actual temps, but it should be sufficient for comparison purposes.
I use heat absorbing glass (Omega P/N 473-103) placed installed in the highest slot in my condenser head. I had the variable condenser in the lowest spot (for lenses up to 80mm). I placed the thermocouple 0.425 inches above the heat absorbing glass which positions it about 0.700 inches below the bulb. The temperature readings very greatly if the thermocouple is closer or further away from the bulb even by small amounts, so I repeatedly verified that the thermocouple never moved throughout the testing.
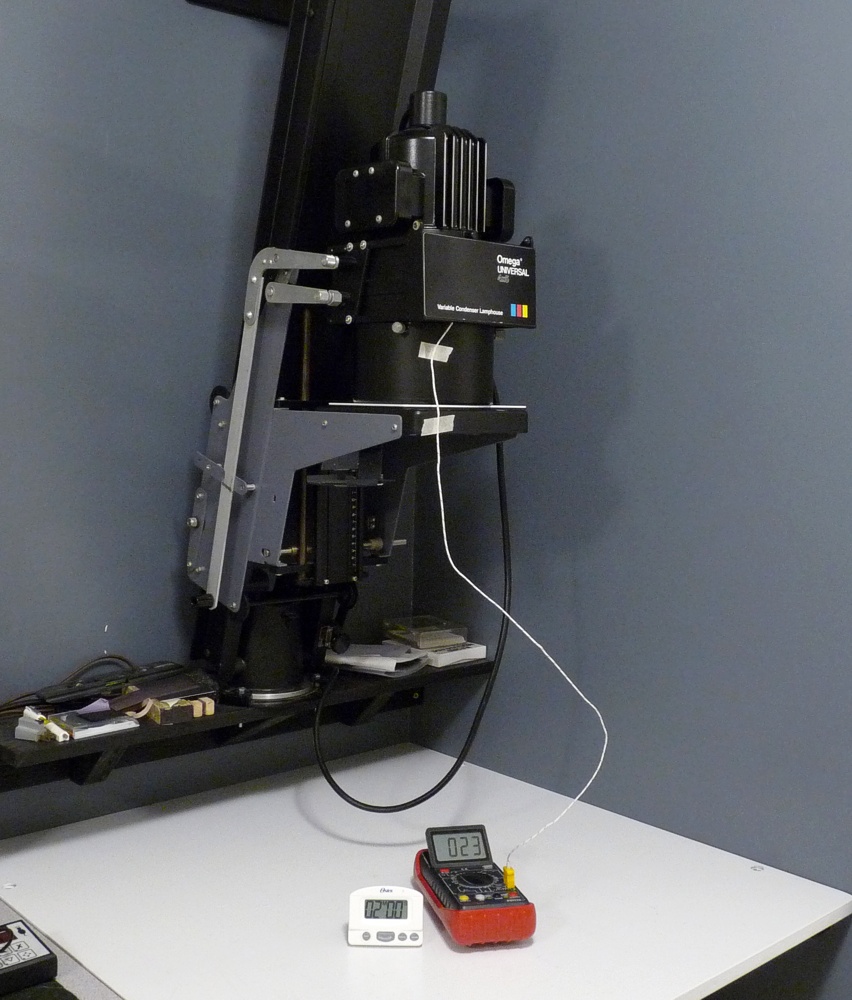
Test configuration: Thermocouple just above heat glass
I turned on the lamp and measured the temperature every 30 seconds up to 2 minutes and then turned the lamp off and measured the cool down for another 2 minutes.
Results
Rather than try to learn how to do a table in WordPress, I just used an image file. The lamp is on for the first 120 seconds and then turned off for the next 120 seconds for a total measurement period of 240 seconds.
Conclusion
It’s pretty easy to see that the 250W bulb creates a lot more heat stress than the lower wattage bulbs. Temperature build-up really depends on how long your exposures are and how much of the time the lamp is off and cooling down. Cool down is slow, so I allowed a considerable interval between tests. I know from my own past experience that the negative stage stays relatively cool regardless of the bulb wattage because there is so much glass separating the bulb from the negative. But, since I practically never make more than a few exposures from the same negative, the average off time of the enlarger far exceeds the on time.
I have decided to remove the plastic covers and add a small cooling fan to each side of the lamphouse. I will have pictures and test results from that project in a future article.