
If you’ve been involved in darkroom photography very long, you already know that corner-to-corner sharpness of a print made using an enlarger requires a properly aligned enlarger. That simply means that the negative, lens board, and baseboard are all parallel to each other. Tools are available to help verify and adjust the alignment of your enlarger.
I’ve tried enlarger alignment using bubble levels and a clumsy, although workable, DIY version of the ZIg-Align.
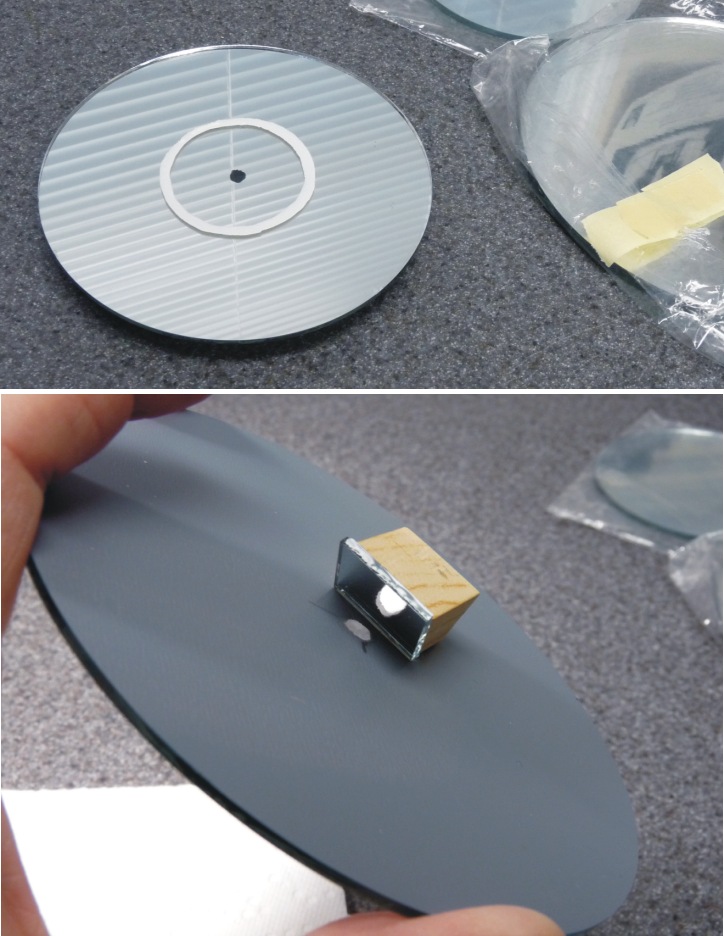
DIY mirror alignment system based on Zig-Align (although not as good).
In my opinion, laser alignment tools are the easiest to use, easiest to see, and provide ample precision. “Easy” is important if you intend to make alignment verification part of your routine. The Versalab Parallel tool looks like a great solution, but it costs $200+.
The laser tool I finally settled on consists of a 3D printed platform to hold a low cost laser sight. If you have access to a 3D printer, the design created by Larry Gebhardt at Tripping Through the Dark is the best low cost solution for quick and easy enlarger alignment. Below are pictures of the one I printed from the file supplied at Thingiverse. I got the laser sight on Amazon for $10.99, but Amazon no longer lists it. They are, however sold new on ebay for under $10.
CAUTION! BE CAREFUL NOT TO SHINE THE BEAM IN ANYONE’S EYES!

I added the little square piece of post-it note to the top to make it easier to read when the beam is reflected almost directly back into itself.
Laser Tool Calibration
The laser alignment tool must be calibrated to be sure he beam is perfectly perpendicular to the base. To do this, you simply set the tool on a horizontal flat surface pointing up at the ceiling, turn on the bean, and adjust the two set screws until the point of light on the ceiling remains stationary when you rotate the tool in place. I use the center head from a combination square to keep the tool in place as I rotate it, but anything with a L-shape can be used. If the tool is not calibrated when you rotate it, it will trace a circle on the ceiling which means the beam is not perfectly perpendicular to the table.
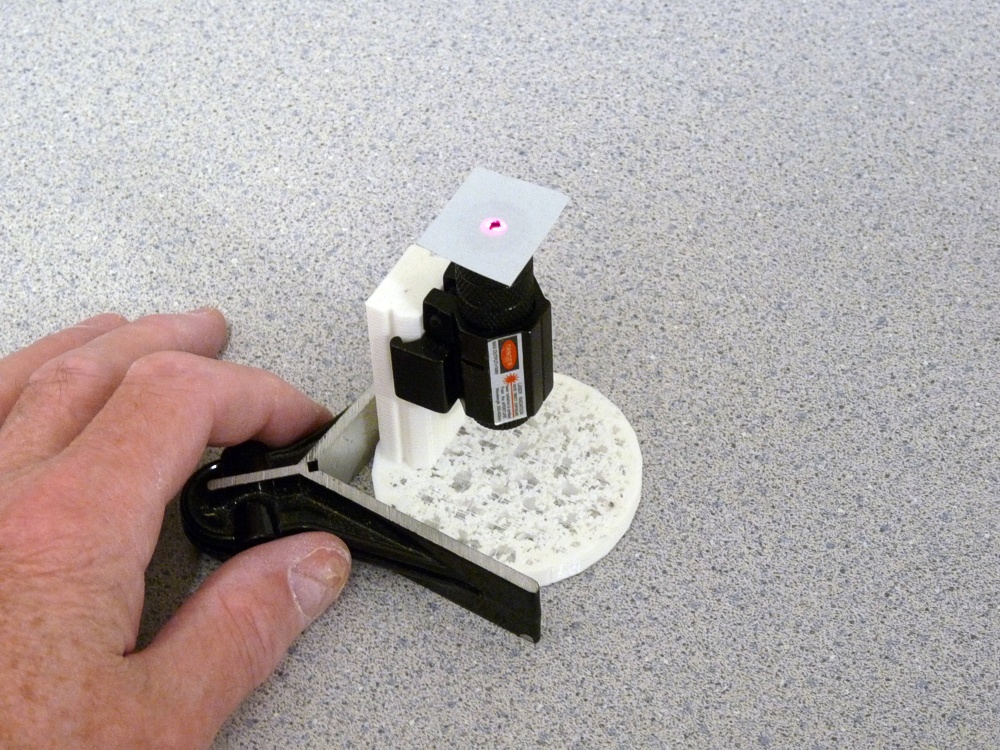
Calibration of the tool requires you to be able to rotate it on a flat horizontal surface without it moving.
I tacked a 1″ paper target to the ceiling above my darkroom counter top as a reference point. Once you have it adjusted, it stays put almost forever.

I tacked a paper target 1″ in diameter to the ceiling as a reference point.
Using the Laser Alignment Tool
To use the alignment tool, you simply place it on the baseboard or easel below your enlarger so the beam shines directly up through the lens mounting hole. You align the negative stage by placing a piece of glass where the negative carrier normally goes and adjust it until the beam reflects off the glass directly hack down into the center of the laser. A glass type negative carrier can, of course, be used instead of a separate piece of glass. I put a piece of black paper on top of the glass to prevent any spurious reflections (e.g. from a condenser lens or mixing chamber above the glass).
The lens stage is aligned in a similar manner. Instead of attaching the glass, you can simply screw a flat filter onto the front of the lens. I once tried using a 49mm filter with a cheap ebay adapter to fit the 40.5 mm threads on the lens, but the adapter thread was apparently a different pitch because it didn’t screw all the way in and when I rotated the lens (as you can do with El-Nikkors), the reflected beam moved in a circle indicating that the filter was not perpendicular to the lens axis. When I tried a 52mm filter with a cheap 52 to 40.5 mm ebay adapter, it worked fine.
If you don’t have a filter, you have to find a way to attach the glass to the lens stage or the front of the lens. I’ve done this using a rubber band to attach a piece of 4″ x 5″ picture frame glass to a lens board with a few lens spacers installed.

To align the lens stage, I attach a 4″ x 5″ piece of glass to a lens board with a rubber band.

Note the lens spacers above the glass to make sure the glass is registered to the same plane as the lens. The tape protects the rubber band from the sharp edges of the glass, but must not come between the glass and the lens board.
Alignment Sequence
Since adjustment of the forward and backwards tilt of the lens stage on the Omaga D5 seems to require adjusting the tilt of the entire carriage, it is best to align the lens stage before the negative stage. In other words, adjusting the eccentric rods to affect the forwards/backwards tilt of the lens stage will also affect the tilt of the negative carrier.
Rechecking Alignment
Once you have the enlarger aligned, it is a fairly simple matter to check the alignment before a printing session. It is also easy to verify alignment after setting up the enlarger for an important print that you want to be perfect. You can very easily experiment to see what factors may affect the alignment. For example, does the alignment change when you raise or lower the head? If you use glass carriers, see if different carriers affect the alignment. Same is true of different easels or if you have an adjustable table.